Showing posts with label DIY. Show all posts

Monday, 11 August 2014

Shoe makeover


First of all, here is what you will need for this little shoe makeover:
 - the shoes off course!
 - a scissor (or a sharp knife)
 - black/grey acrylic paint
 - a paint brush
 - some water


After trying theese shoes, that I got from my friend, I had to admit that leopard just wasn't my style. So my original plan was to paint them all black, but since the shoes are made of suede, I tried to prevent them from getting hard by painting them with acrylic paint mixed up with water. This gave a completely different look, but I actually really liked that you could still see the leopard print in a more sofisticated way.


1. So to get this look, you just have to soak your paintbrush in the water, put a little bit af paint on it, and rub/blend/paint it on both shoes. When you have done this, they should look like this:
(depending on how dark you want them, you can just add more paint/put less water on your brush)


 2. There were just one too many strips on the shoe, so I decided to cut some of them off asymmetrcally. After you have cut some of the strips off, it's a good idea to take a black marker and draw on the parts that now are visible because you cut the strips off. And then you are done!


Wednesday, 9 July 2014

Simple dress makeover

I'm going to Berlin this Saturday, and I needed an easy little dress to come with me. I didn't feel like making one from scratch, so I took my mothers old dress, did a quick makeover, and the finishing result is now lying on the bottom of my suitcase.
It's really easy to transform one of your (or your mothers) old dresses, so before you just throw it away, scroll down and find out how you can turn it into this:


Shortening the dress:
This is a very regular step in the refashion process, and fortunately it's really easy. 


1. Measure and cut the dress in the desired length + 3-4 cm extra
2. Hem it!
 - An easy tip is to roll the fabric twice instead of just one time, so you get a double hem. This will prevent the fabric from wrinkling, and give you a nice and even hem.
 - When sewing the hem, you can just sew a straight stitch all the way around because it's a double hem. If it's a single hem, you have to overlock the edge before you hem it.

"Fitting the dress":
As you can see on the picture below, the dress was too big around the waist, so it needed to be fitted.
Usually I would fit a dress by wearing the dress inside out and pinning it on each side of the dress, so it fits the body. But since this dress isn't elastic at all, I would need to put a zipper in it, to be able to get it over my hips.
I was way too lazy to do this, So instead I used the piece that I cut of the dress, and made a waist band out of it.


It's really easy to make a waistband, but since it suddenly get's all complicated when I'm trying to explain how to do it, I will let wiki how learn you how to sew a waistband.
I love giving old clothes new life, so I will definitely be posting more refashions.
In the meantime, you can take a look at this blog - http://refashionista.net/, where there are hundreds of examples on how to give all sorts of clothing a fun makeover!

Saturday, 14 June 2014

DIY - recipe book

My sister has been interested in healthy food for a long time, which now has resulted in a blog - basicallyfruitytarian. The blog consists of recipes of healthy, but still very delicious, meals that I am so lucky to taste almost every day. I especially can't get enough of the banana bread :-)
A while ago she bought a simple journal where she could write all of her genius recipes down. But the journal looked so boring, that I had to spice it up a bit:

What you will need:
 - some magazines with cool pictures, that are relevant to your journal
 - cardboard
 - the journal itself


Since it's a recipe book, it's a good idea to buy a journal with a plastic "cover", so the beautiful front-page you make won't be messed up by tomato sauce.


Cut out the pictures you choose, and remember to have both big and small pictures.


Cut out the letters, that are going to spell the name of your journal, and draw along the edges of the letters with a marker. This makes them seem more finished.


Now you just have to glue the pictures an the letters to the cover of the journal. You can experiment with the layout as much as you want to, but remember to use the larger pictures as a base.
And then you're done :-)

Saturday, 17 May 2014

DIY - personal sweatshirt

When you need to make a gift, but don't have the time to make it from scratch, a personalized gift is a good solution. In this case it's a simple crop-top sweatshirt from HM, that I personalized as a gift to my sister. 

Here's what you need:
 - a basic sweatshirt 
 - some thick fabric, like felt 
 - a scissor and a white marker 
 - and off course a sewing machine


When you have all your materials, you need figure out what you want to write. I wrote my sisters nickname, and her favorite number.


Then you have to measure how big you want the letters and numbers to be, and draw them on the felt. 
Remember to draw "mirrored", because you will be turning the letters and numbers around.


Then you just pin the felt letters/numbers to the sweatshirt...


... and zig-zag all the way around them.


TIP: it's best to start with the inner-circel in the zero's and the o's, because the fabric will wrinkle in a weird way if you don't. And then you are done! 


Saturday, 1 March 2014

DIY - Slave bracelet

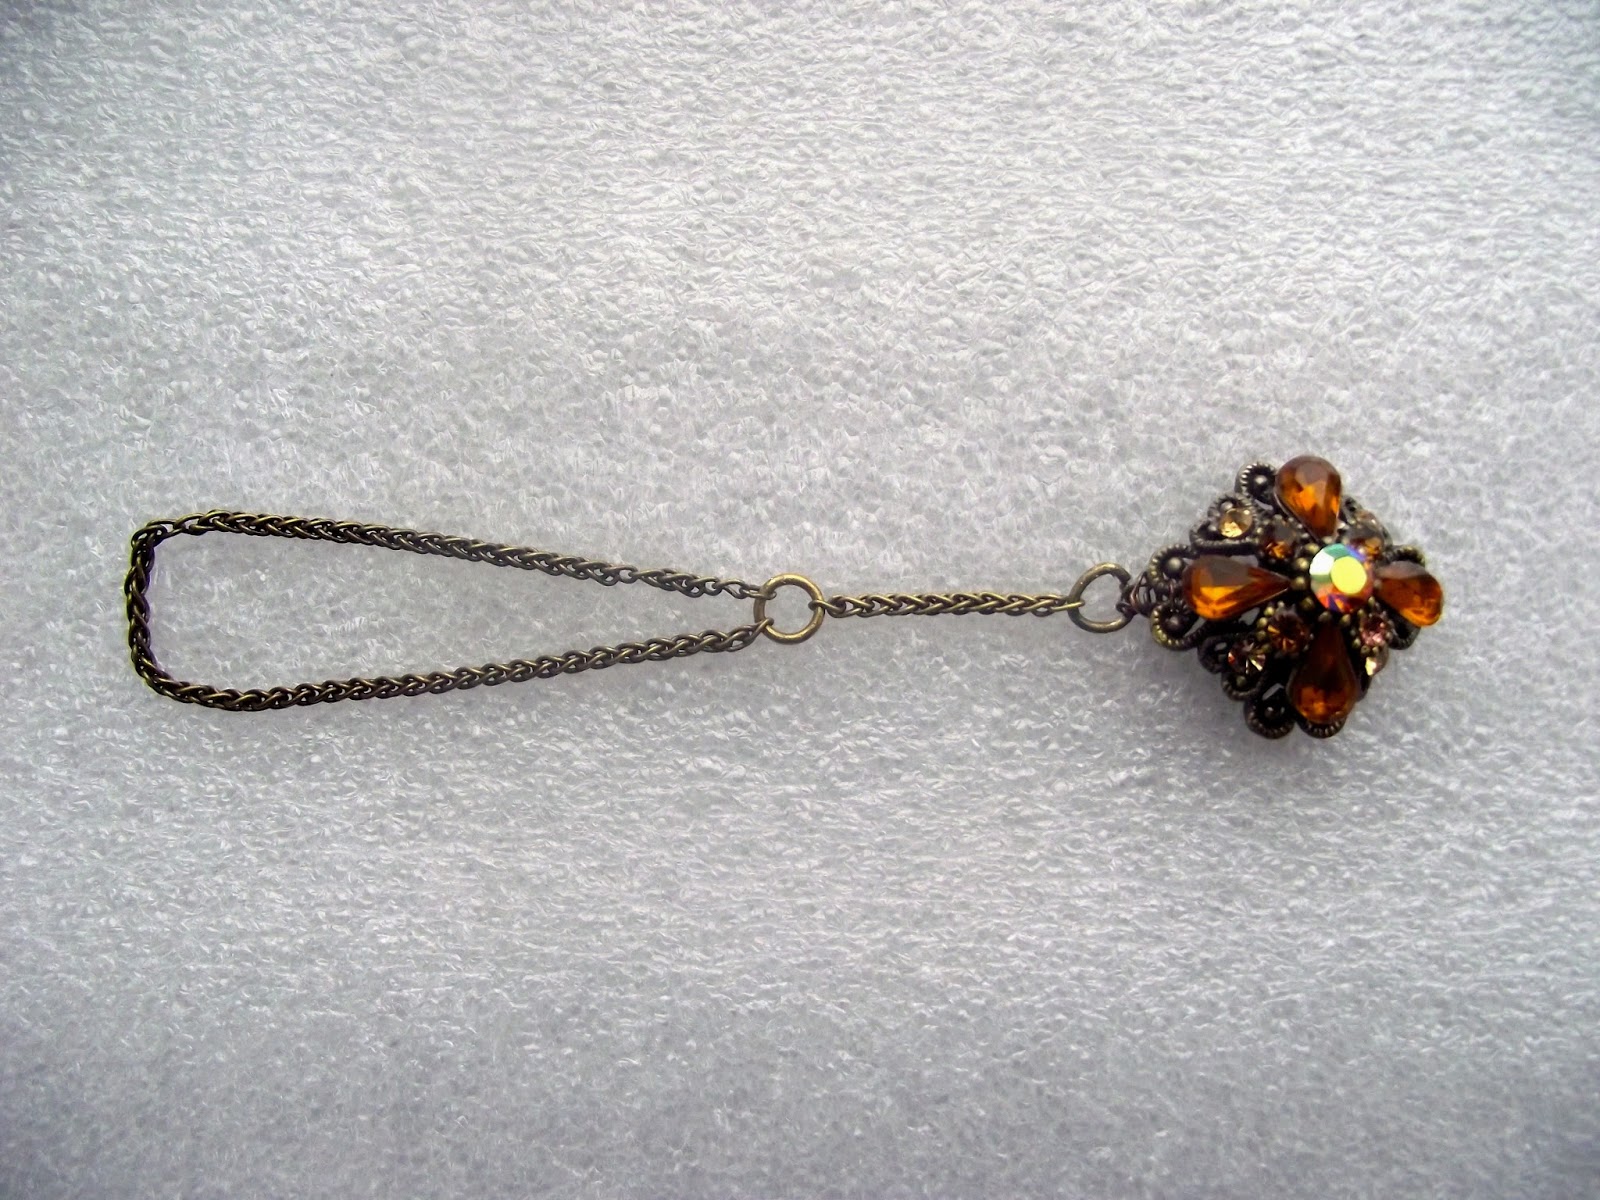
Sometimes I find something special on the street, just like that... A long time ago I found this beautiful pendant, and today I found out what I was going to use it to.

I haven been looking at these slave bracelets for a long time, and even though I like simple, I thought that just making it with chain would be a bit boring. But then I thought of the pendant, and it was perfect as a beautiful detail.

To make this slave bracelet (or one that looks like it) you'll need:

 - chain
 - a pendant (with holes so you can add 3 jump rings to it)
 - 6 jumprings
 - plyers
 - lobster clasps (I think they are called that, but it's what closes the bracelet)
 - (I used nail polish to put on the pendant, because a stone was missing)


When you got what you need, you just have to cut the chain into 4 pieces.


The first one goes around your middle finger and are connected with a jump ring. 


The second one is then added to the jumping that connected the finger chain, and then you add it to a jump ring that are connected with the pendant, in the other end. 


Then you add a chain to each side of the pendant, and finally you add a lobster clasps to one of the bracelet chains, and a jump ring to the other, and then you're done!